Hi All,
We have an exciting guest tutorial on the blog today from Waltzingmouse Stamps! If you have come across Waltzingmouse Stamps (WMS) before you don’t need me to tell you how stunning their stamps are. Personally I have lots of their sets and they are definitely my go to sets, especially their amazing sentiment sets!
Today we have Sandie Dunne from the WMS Design Team with a fantastic tutorial on how to create these gorgeous holiday ornaments.
Holiday Ornament Tutorial

What you Will Need:
Spellbinders Nestabilities: 2011 Heirloom Ornaments & 2012 Heirloom Ornaments
Inks: Festive Berries & Evergreen Bough distress inks, Versa Color Gold, Stampin’ Up Baja Breeze & Tuxedo Black Memento.
White Card
Coordinating ribbons
Glue
How to:
Step 1 – Stamp the bauble designs onto the white card and cut out using the nestabilities. For each bauble you will need 5 pieces plus one for the back – 6 in total.


Step 2 – Score 5 of the pieces directly down the centre and fold in half, with the stamped side facing inwards.

Step 3 – Taking the un-scored shape, and with the stamped side facing down/white side facing up, adhere the ribbon. (I wasn’t happy with my stamping on this one so I turned it over and stamped again on the other side, both sides are stamped.)

Step 4 – Assembling the paper bauble.
Firstly, as you have 5 shapes you will have 3 of one colour and two of the other colour. Take two shapes from the colour you have 3 of (in this case, green). Spread glue along half of one of the shapes, and press it firmly against the matching half of the un-scored shape, covering the ribbon. Repeat with the other side.

Next take the two shapes in contrasting colour (red) and repeat, adhering the shapes to the surface of the first layer.
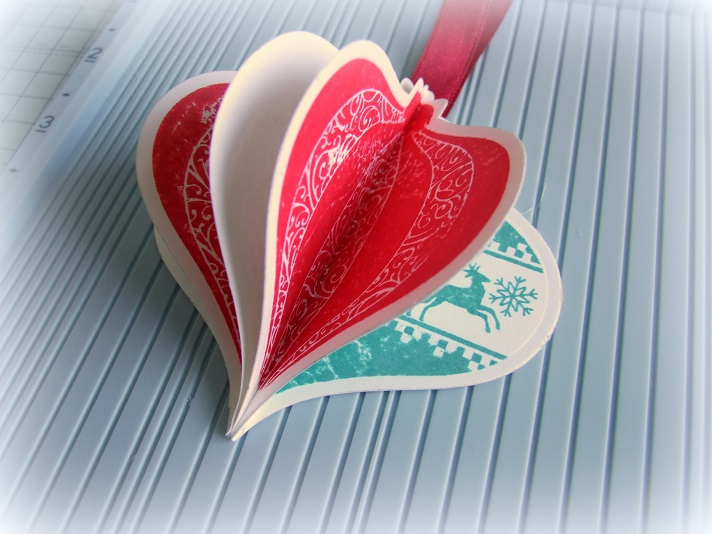
Finally, take the remaining shape and adhere it to the centre. Allow some time for it to dry completely.


You can make a range of different sized, shaped and coloured baubles using the stamp sets and dies listed in the products at the top of this tutorial.
Here are a couple more I’ve made using the very same technique


On the Blue & White bauble I’ve heat embossed some snowflakes (from the Alpine Christmas stamp set) with clear embossing powder which is hard to pick it up on camera but it’s much clearer ‘in the flesh’.

We hope you enjoyed this fantastic tutorial from Waltzingmouse Stamps and give this a go, its a brilliant little project as a holiday gift or decor. Stop by their Facebook page and tell them we said Hi!!
Happy Crafting!


These are really gorgeous Nicole. Nicola x